Should I Have My Home Security Cameras Run Continuously
How to get a security camera recording all the time? Today, the most pop recorders include an NVR (Network Video Recorder), a DVR (Digital Video Recorder), a computer (the hard drive on the computer actually), a Micro SD card, the FTP server, and Cloud. So, in this post, we're gonna talk about the methods in detail to record your security cameras to those recorders.
The following information is the core of this article:
Option 1. Recording Security Camera Video on NVR/DVR All the Time
The best way to record a security camera is to use an NVR (Network Video Recorder) or a DVR (Digital Video Recorder), and you can delete CCTV footage directly from an NVR.
Most NVRs and DVRs come with a built-in HDD with large capacity, such as 1TB, 2TB, 3TB, etc. And you can install an external hard disk drive via e-SATA on the NVR/DVR for more storage.
Recording a security camera to NVR or DVR means recording the video to the HDD. Thus the HDD capacity will have a big influence on how long you can record the video and whether you can do the 24/7 video recording.
An NVR can get your security cameras recording all the time, not only the video but also the voice, Reolink RLK8-800B4, a PoE security camera NVR system, for example.
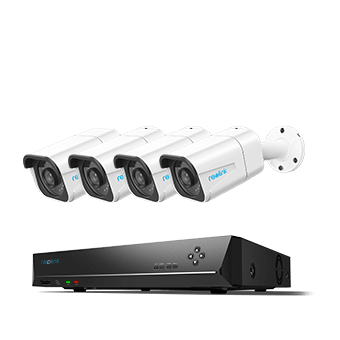
Reolink RLK8-800B4
4K 8-Channel PoE Security System
4 pcs 4K Ultral HD Security Cameras; 2TB HDD 8-Channel NVR for 24/7 Recording; Person/Vehicle Detection; Plug & Play; 2 Network Solutions.
Here is video footage captured by this product, showing the whole process that a postman knocked over someone's trash can.
And the recording won't mess up with your network, because they have their proprietary network to transmit the video, which means the video recording won't "eat up" your bandwidths. Only when you need remote viewing on your mobile phone or you want to get live streaming via a computer, will the security camera system access the Internet.
The most important thing you need to consider when recording security cameras is to select a suitable NVR or DVR. Many standalone NVRs and DVRs only work for the cameras from the same brand, and other brands' products may have incompatible issues.
Therefore, the best solution is to buy the cameras and an NVR/DVR from the same brand, or you can select a whole set.
Steps for Continuous Recording Security Camera Video to NVR/DVR
Recording security camera video and voice to the NVR/DVR HDD is very simple. Let's take Reolink cameras and NVR as an example.
-
Step 1. Connect the cameras to the recorder, NVR.
-
Step 2. Make sure the products have power supply. Now the cameras and the NVR are connected to each other, and they can start communication.
-
Step 3. Connect the NVR to a monitor (or an HD TV). The monitor will display the setting screen.
-
Step 4. Navigate to the video recording settings.
-
Step 5. You can set up the recording now, such as 24/7 recording, or motion detection recording (which means only when the cameras detect a moving action will the recording begin).

Now you've succeeded to get the surveillance cameras recording on the NVR. You can play back the video later to check what's happening if you are not around there. You can also export the video to an SD card and transfer it to where you want it to be saved.
If you want remote viewing, like you want to get live streaming on your mobile phone when you are at work, connect the NVR to your network (connect the NVR to the router).
Option 2. Recording IP Cameras to SD Card
Many IP cameras have a built-in SD card. The capacity of the SD card normally is 16GB or 32GB, and it's only for motion event recording. That is, only when there is a motion event, will the camera record to the SD card.
And some security cameras, like Reolink E1 Zoom, have an SD card slot, which allows you to have the option to put into your own Micro SD card for motion event recording.
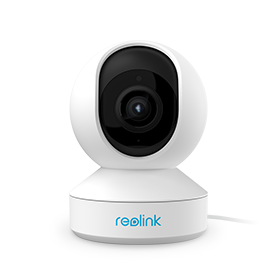
Reolink E1 Zoom
PTZ Wireless Smart Home Camera
Smart, Powerful and Affordable All-Round Home Protection. 355° Pan and 50° Tilt; 5MP Super HD, 3X Optical Zoom, Two-Way Audio, 2.4/5 GHz WiFi, with Google Assistant Integration.
Here is a nighttime video recording captured by this indoor PTZ security camera.
Steps for Recording IP Cameras onto SD Card
- Step 1. Make sure your IP camera supports an SD card and has an SD card inserted.
- Step 2. Connect the security camera to the network.
- Step 3. On the computer with the same network, run the surveillance camera software/app.
- Step 4. After the software connects to the camera, start all the settings you want.
- Step 5. Normally, recording an IP camera to the SD card is a default setting. To 100% guarantee that, check if this option has been selected.
And even if the camera is offline, it can still record motion events to the SD card.
The cheapest way to record a security camera to a recorder is to record the footage on a laptop or a desktop computer. Check your budget and if you find buying the NVR/DVR is beyond the budget, you can try the free surveillance camera software/app for recording the IP camera without DVR/NVR onto a Windows PC or Mac computer.
Recording a wired IP camera or a wireless security camera to a computer means recording the footage to the computer hard drive (and you can plug in a flash drive or a USB drive to record the security camera to it). The very important thing to get the security camera to record (without DVR/NVR) on a laptop or desktop computer, is to keep the computer running all the time. See the detailed steps below.
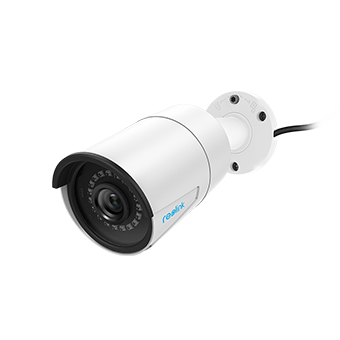
Security Cameras and Security Systems
Your Best Security Camera or Security System Solutions; Plug and Play; 5MP/4MP Super HD; Smartphone Remote Access; Night Vision & Motion Detection
Steps for Recording a Security Camera to Laptop/Computer/Mac
-
Step 1. Connect the security camera to the network. See the problems and solutions to connect a wireless security camera to network.
-
Step 2. On the computer with the same network, run the surveillance camera software/app.
-
Step 3. After the software connects to the camera, navigate to the video recording settings.
-
Step 4. Set up the video recording, such as 24/7 recording and scheduled time recording.
-
Step 5. Select the recoding path where you want to save the footage.
-
Step 6. Keep the software and the computer running all the time. If you shut off the software or the computer, the recording will stop.
Editor's Note: Since we've covered all in the post: 5 Methods to Connect Your IP Cam to PC, you may refer to it to see all the information.
Here is the video showing you how to set up 24/7 continuous recording on your phone, laptop, and NVR. Follow it step by step and get things easily done.
Option 4. Recording Surveillance Cameras on an FTP Server Round-the-Clock
If you want to remotely record a security camera, you can try to set up the recording to an FTP server. Most security cameras are allowed to record footage to a remote FTP server, and that would be a cheap way to get the security camera to record all the time. If your FTP server is within the same network with the cameras, that would be better.
Recording the surveillance camera to an FTP server is similar to recording on a computer. You need to set up the settings via the software/app on a computer.
Security Cameras and Security Systems
Your Best Security Camera or Security System Solutions; Plug and Play; 5MP/4MP Super HD; Smartphone Remote Access; Night Vision & Motion Detection
Steps to Record Surveillance Cameras on an FTP Server Round-the-Clock
-
Step 1. Connect the security camera to the network.
-
Step 2. On the computer with the same network, run the surveillance camera software/app.
-
Step 3. After the software connects to the camera, navigate to the video recording settings.
-
Step 4. Set up the video recording, such as 24/7 recording or motion detection recording.
-
Step 5. Select the recording path on the FTP server where you want to save the footage.
-
Step 6. Now you can close the software and the computer.
Do remember that you need to keep the FTP server running all the time during the recording.

WAIT! Check out these Special Deals before you leave:
Right now, you can get EXCLUSIVE & BIG discounts on a wide range of Reolink security cameras & systems, wire-free & plugged-in, indoors & outdoors.
Option 5. Recording a Security IP Camera to Cloud
The most expensive way to record a security camera all the time is to record the video to the cloud. You may have some free storage/capacity in the cloud, but that's far not enough. You have to pay for more cloud storage to save the footage and that would be a big money.
And the good news is, Reolink has made cloud storage much more affordable, and you may get free capacity at the right time. And for more information about cloud storage, you may refer to Top Things to Know About Free IP Camera Cloud Storage.
Steps to Record a Security Camera to Cloud
-
Step 1. Find a cloud storage service provider.
-
Step 2. Sign in to get an account.
-
Step 3. Select a plan according to your needs and budget.
-
Step 4. Contact the company for more details.
-
Step 5. Follow the guide offered by the company to record a security camera video to the cloud.
Normally, it only takes a few minutes to set up the settings for recording security cameras to the recorders, such as on to an NVR/DVR, an SD card, a computer, an FTP server, or the cloud.
Source: https://reolink.com/blog/record-security-camera-for-24-7/
0 Response to "Should I Have My Home Security Cameras Run Continuously"
Post a Comment